Sabtu, 31 Desember 2016

Create an Awesome Halftone Splash Effect in Photoshop

In this tutorial, we'll see how to transform an image into an Awesome Halftone Splash Effect with Scanned textures using Adobe Photoshop CC 2017. The main idea for this course is to know how to manipulate and work with textures using Photoshop's powerful tool layer masks, and find a good combination with the texture and the image we'll be using, to end up with a cool portrait effect.
➤ Before you start watching, notice that this tutorial was made using Windows OS, so for Mac users simply alter Ctrl with CMD, and Alt with the Opt key.


—Stock:
:::::IMPORTANT: Any stocks are used for preview and tutorial purposes only. in case you want to use it you need to read the rules from the owners of this stocks.

—Scanned Textures by: Ninja Rabit Stock
-Download

—Halftone Patterns by: Fakefebruary
-Download

—Models:
-Model 1 - Model 2 - Model 3 - Model 4 - Model 5

Jumat, 16 Desember 2016

52 Custom Shapes For Business Cards

52 Custom Shapes For Business Cards
I recently received many request about the custom shapes icons I use to create business cards, so I thought it would be cool to post them and make this icons available for everyone who want to use them. This free pack of Photoshop custom shapes features a set of 52 Custom Shapes Icons, very useful for Business Cards creations, all in one single .CSH file. ENJOY!!

52 Custom Shapes For Business Cards

52 Custom Shapes For Business Cards


⟶How to install Custom Shapes (.csh):
 
Download the custom shape presets (its the one ending with *.csh).
❷ To add the presets to Photoshop, place them into the folder Custom Shapes in Photoshop Presets: C:\Program Files\Adobe\Photoshop\Presets\Custom Shapes\. (this path may vary depending on your version of Photoshop and where its installed)
❸ Now open Photoshop. (If you had it open during the installation, you’ll need to close it and re-open it again) Click on Photoshop’s custom shapes tool (or click “U”). Make sure to select “Custom Shape Tool.”
❹ Now to load the shapes set. In your top bar, look for the shape thumbnail, and click on the small arrow just to the right of it, a window will pops up shows your currently loaded shapes. In order to load the set, you'll need to click on that small arrow next to a gear icon, find the set (ADR_52-Custom-Shapes-Icons-for-Business-Cards) and click on it. Photoshop will ask you if you want to “Replace current shapes with the shapes from ADR_52-Custom-Shapes-Icons-for-Business-Cards?” Choose OK. and you're done.

Hopefully you’ll find it useful. Please, if you like it, take some time to share it, it’s highly appreciated.
Thank you


Selasa, 06 Desember 2016

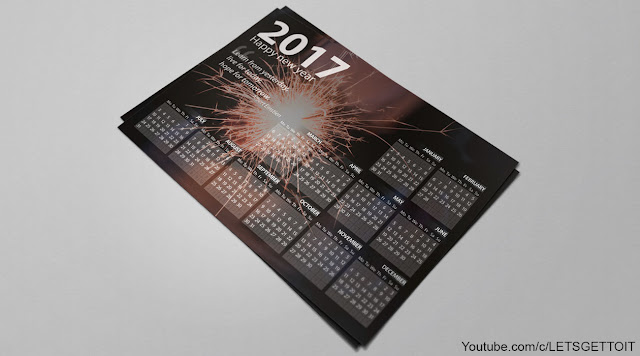
How to Make a Professional Calendar in Photoshop

How to Make a Professional Calendar in Photoshop
In this tutorial, we'll see how to make a professional calendar using Adobe Photoshop CC 2017, though professionally speaking, InDesign and Illustrator are the best platform for that, but since a lot prefer working on Photoshop, we'll see how to design a professional calendar from scratch using nothing but Photoshop.
➤ Before you start watching, notice that this tutorial was made using Windows OS, so for Mac users simply alter Ctrl with CMD, and Alt with the Opt key.
đź””Relevant links:


How to Make a Professional Calendar in Photoshop_Preview 2
 
How to Make a Professional Calendar in Photoshop_Preview 1
—Stock:
►▷IMPORTANT: Any stocks are used for preview and tutorial purposes only. in case you want to use it you need to read the rules from the owners of this stocks.

Firworks image: image